はじめに
今回は、AWS の Amazon EC2 インスタンス上への Zammad の導入を試みる。
Zammadとは
Zammadは、お客様からの問い合わせをオンラインで管理することのできるオープンソースソフトウェアのヘルプデスクシステムです。
引用元:ヘルプデスクツールのおすすめOSS〜Zammad〜
ハードウェア要件
For Zammad and a database server like PostgreSQL we recommend at least:
- 2 CPU cores
- 4 GB of RAM (+4 GB if you want to run Elasticsearch on the same server)
引用元:https://docs.zammad.org/en/latest/prerequisites/hardware.html
上記を参考に、下記をハードウェア要件とする。
- 2 CPU
- 4 GB メモリ(Elasticsearch を同じサーバ上で動かす場合は +4GB)→ 8 GB メモリを採用
- ディスク容量 明記なし → 20 GB を採用
今回は1サーバ上で一旦すべてを完結させて動作を見たいので、2CPU+8GBメモリの環境を用意することとし、EC2 インスタンスの t3a.large + 20GB のディスクを利用する。
利用する t3a.large の利用料金は こちら を参照して計算。
スポットインスタンス の利用も考えたんだけど、とりあえずスタートダッシュをサクッと切りたかったので オンデマンドインスタンス で開始。今後本格利用をする場合には、スポットインスタンス の利用も考えるし、Amazon ECS Fargate を使って公式の Zammad Docker イメージの利用も検討しようと思うので、とりあえず今回は オンデマンドインスタンスを利用する。
本記事作成時点での 東京リージョン における1時間当たりの t3a.large の利用料金は 0.0979 USD。
仮に1ヵ月起動しっぱなしにした場合、24時間 x 30.5 x 0.0979 USD x132.78円(本日のドル円為替)≒ 9,460円 になる。
検証をした後は間違いなく停止しようと思う。
なお、ディスク容量については要件が記載がないがざっくり適当に 20GB の 汎用 SSD (gp2) ボリューム ディスクをつけることにする。
汎用 SSD (gp2) ボリューム の料金は、1 か月にプロビジョニングされたストレージ 1 GB あたり 0.12USD なので、一ヶ月で 30 x 0.12 USD x 132.78円 = 478円 になる。
さて、これから利用する環境をフルで1ヵ月つけっぱなしにした場合1万円程度の課金がされることが分かった。
検証目的で本記事を参照されている方は、インスタンスを起動しっぱなしにした場合、それ相応の課金がされることをご留意ください。
通信要件
Zammad は、Web ブラウザでアクセスするので、80/tcp 番と 443/tcp 番ポートでのアクセスができるように設定をしましょう。
Amazon Linux 2 は初期状態で firewall や selinux は無効になっておりますので、EC2 インスタンスに設定しているセキュリティグループにて上記ポートが許可されている状態としてください。ここではセキュリティグループの設定方法は省略させていただきます。
導入の記録
ここからは、Amazon Linux 2 の AMI を用いて起動したインスタンスタイプ t3a.large で 20GB のボリュームを付けたインスタンスを対象に、SSH 接続を用いて接続しての作業を記録する。
Amazon Linux 2 は RHEL ベースの OS なので、下記参考サイトに記載のある CentOS にかかわる記述を参考に進める。
参考サイト:
Install from package — Zammad documentation
とりあえずの yum update
インスタンスが起動したら、とりあえず yum update を行ってサーバの再起動を行う。
# yum -y update
# shutdown -r now
検証作業中を通してパッケージやライブラリの更新が影響して作業が止まることを懸念して実行している。本当ならタイムゾーンの設定やロケールの設定もやっておきたいんだけど、そのあたりは公式ページに記載がないし、いつでも戻って設定できるものなので今回は作業スコープ外とする。
言語設定
Zammad のインストトール手順によると、言語設定を行っていないと正常に動作しないことがあるとのこと。
EC2 インスタンスは、初期状態で英語が設定されているが、今回は日本語で使いたいため、日本語を設定する。
# localectl set-locale LANG=ja_JP.utf8
#
# date
Sun Feb 19 01:10:53 UTC 2023
#
# source /etc/locale.conf
# date
2023年 2月 19日 日曜日 01:11:08 UTC
#
インスタンスの再起動をせずに言語設定の再読み込みをさせる:source /etc/locale.conf
必要なソフトウェアの導入
epel 及び postgresql14 yum リポジトリの有効化
Zammad Community の参考サイトでは、wget コマンドと epel という yum リポジトリの追加及び PostgreSQL14 用の yum リポジトリの追加を行っている。Amazon Linux 2 には wget は初期状態で導入されているので、epel リポジトリ 及び postgresql14 リポジトリの有効化を行う。
# amazon-linux-extras install epel -y
# amazon-linux-extras install postgresql14 -y
下記コマンドを実行し、epel と postgresql14 が enabled になっていることを確認する。
# amazon-linux-extras | egrep "epel|postgresql14"
24 epel=latest enabled [ =7.11 =stable ]
63 postgresql14=latest enabled [ =stable ]
#
参考サイト:
EC2上にPostgreSQL14をインストールしてpgAdmin4と接続するまで
CentOS、RHEL、または Amazon Linux を実行している Amazon EC2 インスタンスの EPEL リポジトリを有効にするにはどうすればよいですか?
Elasticsearch の導入
Elasticseach を導入する。Zammad はサービス内の検索に Elasticseach を利用しているみたい。
今まで使ったことなかったけど、とりあえず導入してみる。
参考サイト:
Set up Elasticsearch – Zammad documentation
2 Steps to Install Elasticsearch on an AWS EC2 Amazon Linux 2 Instance
Amazon Linux 2 に Amazon Corretto 8 をインストールする手順
Install Elasticsearch with RPM | Elasticsearch Guide [8.6] | Elastic
Amazon Corretto 8 の導入
Elasticsearch を動かすには Java が必要とのこと。今回は AWS EC2 上で動かす Amazon Linux 2 環境なので、Amazon Corretto を導入する。
# sudo amazon-linux-extras enable corretto8
# yum clean metadata
# yum -y install java-1.8.0-amazon-corretto
# java -version
openjdk version "1.8.0_362"
OpenJDK Runtime Environment Corretto-8.362.08.1 (build 1.8.0_362-b08)
OpenJDK 64-Bit Server VM Corretto-8.362.08.1 (build 25.362-b08, mixed mode)
#
Elasticsearch の導入
RPM パッケージを持ってきて導入する方法もあるようだけど、せっかくなので Elasticsearch の 8.x 用 yum リポジトリを追加設定して yum でサクッと香ばしく焼き上げる。
以下、ヒアドキュメント を用いた記載の方法。vim 等でファイルを作成してもいいんだけど、コピペで設定したいので。ヒアドキュメント だと本当は先頭に「> 」が表示されるけど、コピペしやすく記載を省いています。cat で「EOF」が出てくるまでをまとめて、結果を /etc/yum.repos.d/elasticsearch.repo に出力してます。
# cat <<EOF > /etc/yum.repos.d/elasticsearch.repo
[elasticsearch]
name=Elasticsearch repository for 8.x packages
baseurl=https://artifacts.elastic.co/packages/8.x/yum
gpgcheck=1
gpgkey=https://artifacts.elastic.co/GPG-KEY-elasticsearch
enabled=0
autorefresh=1
type=rpm-md
EOF
# ls -l /etc/yum.repos.d/elasticsearch.repo
-rw-r--r-- 1 root root 222 Feb 14 15:59 /etc/yum.repos.d/elasticsearch.repo
#
# sudo yum -y install --enablerepo=elasticsearch elasticsearch
本来なら elasticsearch を導入後は、「ingest-attachment」というプラグインを導入するんだけど、8.x ではプリインされているプラグインなので実施しない。
The Ingest Attachment plugin is now included in Elasticsearch.
引用元:https://www.elastic.co/guide/en/elasticsearch/plugins/current/ingest-attachment.html
※ この手順は実施しない ※
# /usr/share/elasticsearch/bin/elasticsearch-plugin install ingest-attachment
-> Installing ingest-attachment
[ingest-attachment] is no longer a plugin but instead a module packaged with this distribution of Elasticsearch
-> Please restart Elasticsearch to activate any plugins installed
導入したら Elasticsearch の設定ファイルを変更して下記2点の変更を加える。
- localhost への http 接続許可(8.x で有効になるデフォルト https 通信の設定を無効化)
参考サイト:https://blog.goo.ne.jp/dak-ikd/e/50e75332922a75be1391eace5c479141 - 許容するデータサーズをデフォルトの 100mb から 400mb に変更する
参考サイト:https://docs.zammad.org/en/latest/install/elasticsearch.html#step-2-suggested-configuration
# cp -p /etc/elasticsearch/elasticsearch.yml /etc/elasticsearch/elasticsearch.yml.org~
# vim /etc/elasticsearch/elasticsearch.yml
# diff /etc/elasticsearch/elasticsearch.yml.org~ /etc/elasticsearch/elasticsearch.yml -U2
--- /etc/elasticsearch/elasticsearch.yml.org~ 2023-02-14 16:00:55.862894555 +0000
+++ /etc/elasticsearch/elasticsearch.yml 2023-02-14 16:36:37.044180583 +0000
@@ -96,5 +96,5 @@

# Enable security features
-xpack.security.enabled: true
+xpack.security.enabled: false

xpack.security.enrollment.enabled: true
@@ -102,10 +102,10 @@
# Enable encryption for HTTP API client connections, such as Kibana, Logstash, and Agents
xpack.security.http.ssl:
- enabled: true
+ enabled: false
keystore.path: certs/http.p12

# Enable encryption and mutual authentication between cluster nodes
xpack.security.transport.ssl:
- enabled: true
+ enabled: false
verification_mode: certificate
keystore.path: certs/transport.p12
@@ -124,2 +124,3 @@

#----------------------- END SECURITY AUTO CONFIGURATION -------------------------
+http.max_content_length: 400mb
#
サービスとしての自動起動設定と起動確認を行う。
下記コマンドで Elasticsearch サービスの起動と同時に、自動起動設定を有効化する。
# systemctl enable --now elasticsearch
起動後に下記コマンドを実行し、Elasticsearch が起動しており http 通信で疎通できることを確認する。
# curl -XGET -H "Content: application/json" "127.0.0.1:9200/_cluster/health?pretty"
{
  "cluster_name" : "elasticsearch",
  "status" : "green",
  "timed_out" : false,
  "number_of_nodes" : 1,
  "number_of_data_nodes" : 1,
  "active_primary_shards" : 1,
  "active_shards" : 1,
  "relocating_shards" : 0,
  "initializing_shards" : 0,
  "unassigned_shards" : 0,
  "delayed_unassigned_shards" : 0,
  "number_of_pending_tasks" : 0,
  "number_of_in_flight_fetch" : 0,
  "task_max_waiting_in_queue_millis" : 0,
  "active_shards_percent_as_number" : 100.0
}
#
Zammad の導入
事前準備は完了したので、続いて Zammad の導入を進める。Zammad は yum コマンドで導入するので、yum リポジトリを追加し導入する。
Zammad yum リポジトリの追加
# wget -O /etc/yum.repos.d/zammad.repo https://dl.packager.io/srv/zammad/zammad/stable/installer/el/7.repo
PostgreSQL の導入と初期設定
※ 冒頭で行いました事前準備にて postgresql14 用 yum リポジトリの設定が済んでいない場合は、そちらを実施してください。
# yum -y install postgresql-server
# postgresql-setup initdb
WARNING: using obsoleted argument syntax, try --help
WARNING: arguments transformed to: postgresql-setup --initdb --unit postgresql
* Initializing database in '/var/lib/pgsql/data'
* Initialized, logs are in /var/lib/pgsql/initdb_postgresql.log
#
# systemctl enable --now postgresql
Created symlink from /etc/systemd/system/multi-user.target.wants/postgresql.service to /usr/lib/systemd/system/postgresql.service.
#
Zammad のインストール
# yum -y install zammad
インストール時に今まで経験したことないくらい yum の進行画面がとまり少し焦りました。
体感では2,3分画面の動きが止まったと思います。
Zammad の設定変更
ここでは、「zammad」コマンドを用いて設定の変更を行います。
Elasticsearch 関連の設定変更と検索インデックスの作成
# zammad run rails r "Setting.set('es_url', 'http://localhost:9200')"
# zammad run rake zammad:searchindex:rebuild
# zammad run rails r "Setting.set('es_attachment_ignore', [ '.png', '.jpg', '.jpeg', '.mpeg', '.mpg', '.mov', '.bin', '.exe', '.box', '.mbox' ] )"
# zammad run rails r "Setting.set('es_attachment_max_size_in_mb', 50)"
| 設定項目 | 設定内容説明 | 設定値 |
| es_url | Elasticsearch のURLを設定するパラメータ | http://localhost:9200 |
| es_attachment_ignore | Elasticsearch が検索除外する添付ファイルの拡張子を設定 | ‘.png’, ‘.jpg’, ‘.jpeg’, ‘.mpeg’, ‘.mpg’, ‘.mov’, ‘.bin’, ‘.exe’, ‘.box’, ‘.mbox’ |
| es_attachment_max_size_in_mb | Elasticsearch が検索対象とする添付ファイルの最大サイズ | 50 |
他にも検索を除外したい拡張子がある、検索対象とする添付ファイルサイズを変更したい場合などは状況に合わせ変更ください。
Webサーバー(nginx)の設定
Zammad が用意しているサンプルファイルを元に nginx の設定を変更します。
サンプル設定ファイルのコピー
# cp -p /opt/zammad/contrib/nginx/zammad.conf /etc/nginx/conf.d/zammad.conf
# systemctl restart nginx
(オプション) サーバー上に SSL サーバー証明書を設定する場合
nginx に SSL サーバー証明書を設定する場合には、この手順を進めます。もちろん、ALB 経由でアクセスさせるから SSL 終端にならない、お試し利用だから取り合えず HTTP の利用でOKという場合は、この手順の実行は不要です。
ここでは、Let’s encrypt を用いた無料 SSL サーバー証明書が利用できるように設定します。
ドメイン名の設定
Let’s encrypt を導入する際に、自動的に既存の nginx 設定ファイルから適切な SSL サーバー証明書を利用する設定が追加されるように、コピーした設定ファイルのうちドメイン名を宣言しているところを利用しているドメイン名に置き換え再起動します。vim コマンドでの変更を行ってもいいのですが、ここでは sed コマンドを用いて置換処理を行っています。
# sed -i 's/server_name localhost/server_name yoursite.com/g' /etc/nginx/conf.d/zammad.conf
# systemctl restart nginx
Let’s encrypt を利用するため「certbot」の導入と設定
下記コマンドを実行し、certbot コマンドと、プラグインを導入します。
yum install -y certbot python2-certbot-nginx
certbot コマンドを実行し証明書の設定を進めます。
# certbot Saving debug log to /var/log/letsencrypt/letsencrypt.log Plugins selected: Authenticator nginx, Installer nginx Enter email address (used for urgent renewal and security notices) (Enter 'c' to cancel): ご自身のメールアドレスを入力 - - - - - - - - - - - - - - - - - - - - - - - - - - - - - - - - - - - - - - - - Please read the Terms of Service atYou must agree in order to register with the ACME server. Do you agree? - - - - - - - - - - - - - - - - - - - - - - - - - - - - - - - - - - - - - - - - (Y)es/(N)o: Y - - - - - - - - - - - - - - - - - - - - - - - - - - - - - - - - - - - - - - - - Would you be willing, once your first certificate is successfully issued, to share your email address with the Electronic Frontier Foundation, a founding partner of the Let's Encrypt project and the non-profit organization that develops Certbot? We'd like to send you email about our work encrypting the web, EFF news, campaigns, and ways to support digital freedom. - - - - - - - - - - - - - - - - - - - - - - - - - - - - - - - - - - - - - - - - (Y)es/(N)o: N Account registered. Which names would you like to activate HTTPS for? - - - - - - - - - - - - - - - - - - - - - - - - - - - - - - - - - - - - - - - - 1: yourdomain.com - - - - - - - - - - - - - - - - - - - - - - - - - - - - - - - - - - - - - - - - Select the appropriate numbers separated by commas and/or spaces, or leave input blank to select all options shown (Enter 'c' to cancel): 1 Requesting a certificate for yourdomain.com Performing the following challenges: http-01 challenge for yourdomain.com Waiting for verification... Cleaning up challenges Deploying Certificate to VirtualHost /etc/nginx/conf.d/zammad.conf Redirecting all traffic on port 80 to ssl in /etc/nginx/conf.d/zammad.conf - - - - - - - - - - - - - - - - - - - - - - - - - - - - - - - - - - - - - - - - Congratulations! You have successfully enabled https://yourdomain.com - - - - - - - - - - - - - - - - - - - - - - - - - - - - - - - - - - - - - - - - IMPORTANT NOTES: - Congratulations! Your certificate and chain have been saved at: /etc/letsencrypt/live/yourdomain.com-0001/fullchain.pem Your key file has been saved at: /etc/letsencrypt/live/yourdomain.com-0001/privkey.pem Your certificate will expire on 2023-05-20. To obtain a new or tweaked version of this certificate in the future, simply run certbot again with the "certonly" option. To non-interactively renew *all* of your certificates, run "certbot renew" - If you like Certbot, please consider supporting our work by: Donating to ISRG / Let's Encrypt: https://letsencrypt.org/donate Donating to EFF: https://eff.org/donate-le #

ここまでで certbot の導入と証明書の取得と nginx への設定が完了しております。
Let’s encrypt の証明書は 3ヶ月ごとに更新が必要なため、続いて下記手順を実施し自動更新設定を行います。
証明書を更新した場合に、nginx の再起動を行う設定を追加
# sed -i.org~ "s/POST_HOOK=\"\"/POST_HOOK=\"--post-hook 'systemctl restart nginx'\"/g" /etc/sysconfig/certbot
# diff /etc/sysconfig/certbot.org~ /etc/sysconfig/certbot
29c29
< POST_HOOK=""
---
> POST_HOOK="--post-hook 'systemctl restart nginx'"
#
自動更新設定の有効化
# systemctl enable --now certbot-renew.timer
Created symlink from /etc/systemd/system/timers.target.wants/certbot-renew.timer to /usr/lib/systemd/system/certbot-renew.timer.
#
# systemctl list-timers | grep certbot
日 2023-02-19 15:24:18 UTC 12h left 日 2023-02-19 02:50:59 UTC 2min 35s ago certbot-renew.timer certbot-renew.service
#
参考サイト:
Certificate Automation: Amazon Linux 2 での Let’s Encrypt と Certbot の使用
CentOS7にnginxとcertbotを導入してHTTPS環境をさくっと作るの巻
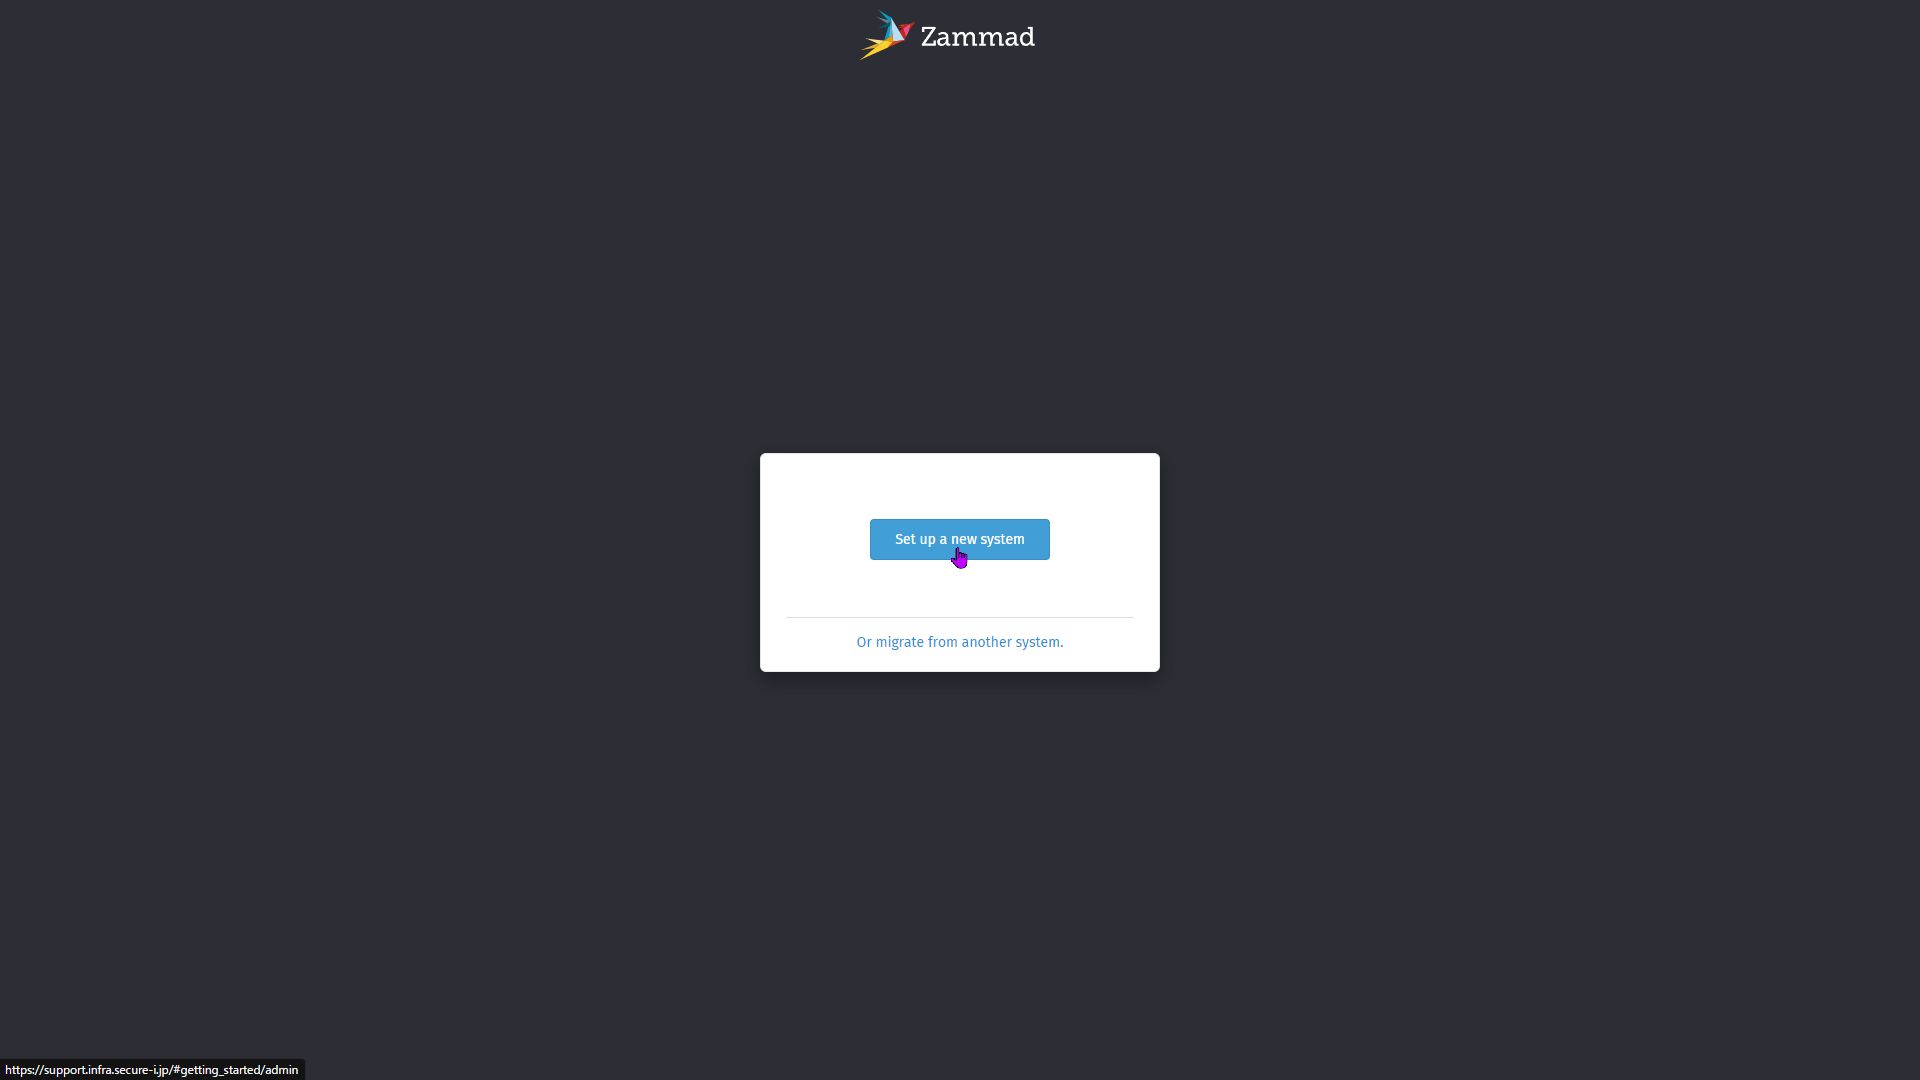
ログイン画面にアクセスし管理者IDの登録
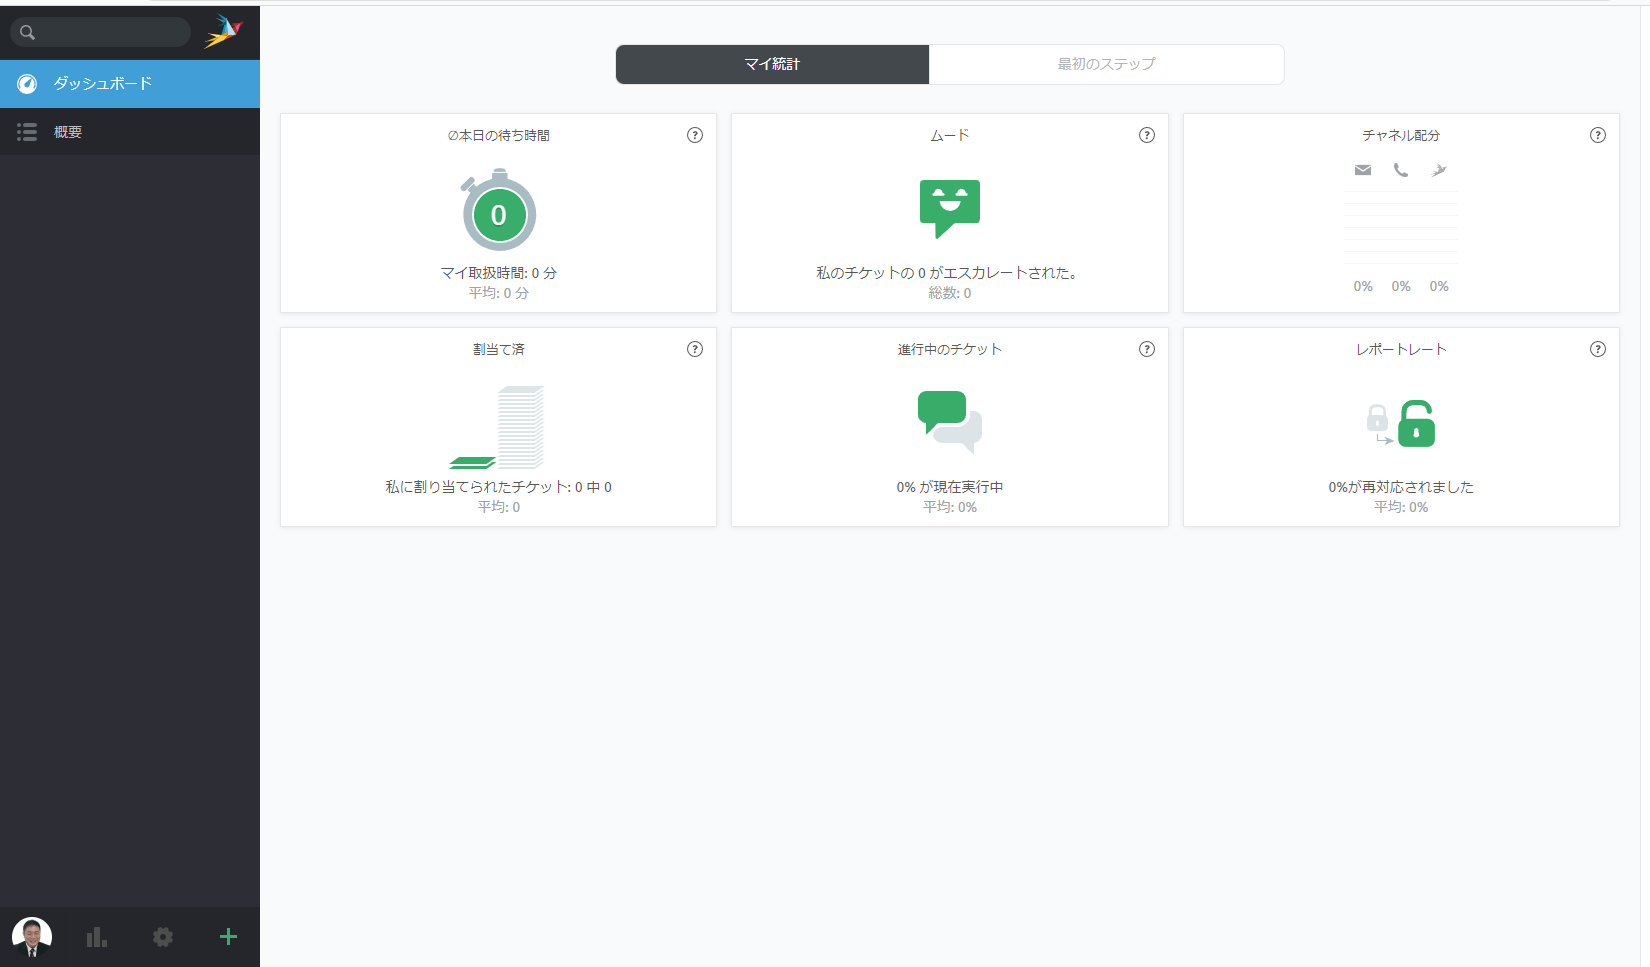
https://yourdomain.com にアクセスして管理者IDとパスワードの登録などなどを進めましょう。
言語設定はユーザのプロフィールから設定できました。
その他の細々しい操作感については、これから触りつつ、わかりにくかったものについては記事にしていこうと思います。
Enjoy your Zammad life!!

コメント